
When it comes to the right way to install asphalt, it seems like everybody has an opinion on what to do. It’s reasonable to say we’ve learned a few things in the process.
Installing or replacing asphalt driveway yourself in Ogden, is certainly not a task for a beginner DIY lover. It’s a lot of work and you’ll need access to a significant equipment.
Thus, to help you lay a perfect pavement or make your new asphalt driveway that looks perfect into the indefinite future, we’ve made this simple to-follow guide on the most effective way to pave an asphalt driveway.
STEP 1: DEMOLISH ANY OLD PAVEMENT AND CLEAR DEBRIS
Foremost you need to deal with while installing new asphalt is to remove the old, damaged surface. Whether it’s asphalt or concrete, start stripping it all away so you can begin with a fresh canvas.
You’ll presumably require heavy machinery to assist you with eliminating the old paving. You can definitely relax on the off chance that you don’t have the machinery – most equipment rental companies can help out here.
Remove all the debris and ensure your surface is totally clean and clear prior to proceeding.
STEP 2: PREPARE YOUR SUB-BASE
The sub-base gives your pavement a stable foundation and is the fundamental support – so it’s really significant!
In winter the sub-base goes about as an ice boundary that reduces damage from continued freezing and defrosting. While you’re installing your sub-base, it should be compacted correctly – if not, the surface of your asphalt will suffer. It most likely won’t last through many seasons and you’ll see cracking and weathering a lot quicker than usual.
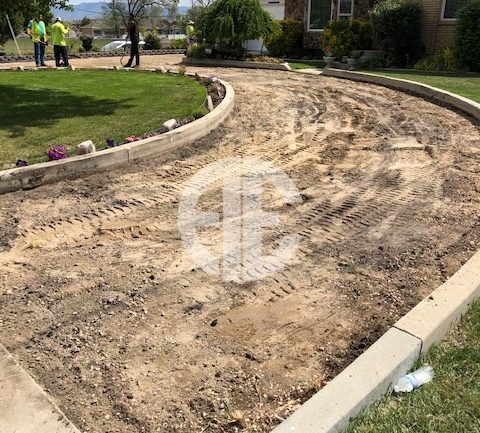
STEP 3: GRADE THE SLOPE TO ENSURE CORRECT DRAINAGE
Since you have a fresh start, now is the ideal time to set up the surface so it has proper water drainage.
Effective drainage will assist with keeping your pavement from collapsing rashly. The surface should be graded to allow any water to run off to the sides and puddle. Legitimate drainage is fundamental for any asphalt pavement as without it, significant damage can happen including cracks, crumbling and potholes.
If you don’t know how to grade the slop yourself, bring in an asphalt paving contactor to help.
STEP 1: DEMOLISH ANY OLD PAVEMENT AND CLEAR DEBRIS
Foremost you need to deal with while installing new asphalt is to remove the old, damaged surface. Whether it’s asphalt or concrete, start stripping it all away so you can begin with a fresh canvas.
You’ll presumably require heavy machinery to assist you with eliminating the old paving. You can definitely relax on the off chance that you don’t have the machinery – most equipment rental companies can help out here.
Remove all the debris and ensure your surface is totally clean and clear prior to proceeding.
STEP 2: PREPARE YOUR SUB-BASE
The sub-base gives your pavement a stable foundation and is the fundamental support – so it’s really significant!
In winter the sub-base goes about as an ice boundary that reduces damage from continued freezing and defrosting. While you’re installing your sub-base, it should be compacted correctly – if not, the surface of your asphalt will suffer. It most likely won’t last through many seasons and you’ll see cracking and weathering a lot quicker than usual.
STEP 3: GRADE THE SLOPE TO ENSURE CORRECT DRAINAGE
Since you have a fresh start, now is the ideal time to set up the surface so it has proper water drainage.
Effective drainage will assist with keeping your pavement from collapsing rashly. The surface should be graded to allow any water to run off to the sides and puddle. Legitimate drainage is fundamental for any asphalt pavement as without it, significant damage can happen including cracks, crumbling and potholes.
If you don’t know how to grade the slop yourself, bring in an asphalt paving contactor to help.

STEP 4: THE PROOF IS IN THE ROLL!
As soon as the sub-base is fully graded and compacted it’s time to proof roll. Proof rolling ensures that the underlying matrix is strong enough to support the asphalt and the loads on it.
If the base flexes an inch or more under the weight of the roller, then it likely won’t be properly support the pavement. You can use undercutting to repair any soft spots in the base. Undercutting involves digging about 2 or 3 feet below the surface and replacing the soil with a stronger material. This will provide your base with the extra support it needs.
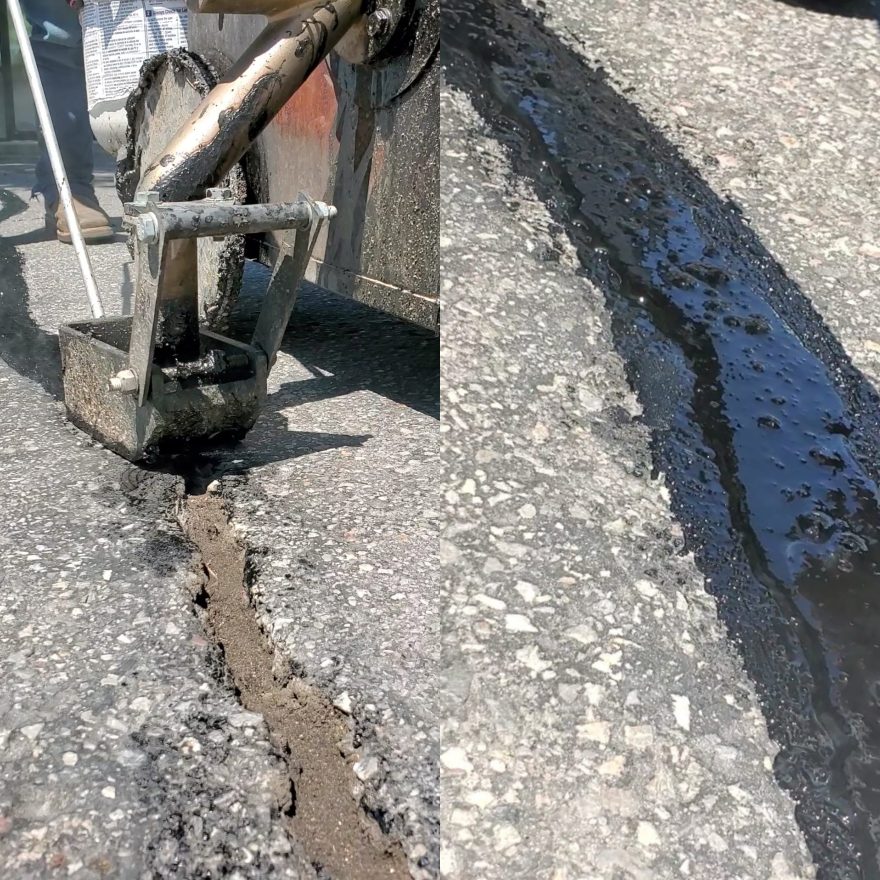
STEP 5: INSTALL THE NEW ASPHALT
After all that, it’s finally time to for you to install asphalt!
As soon as you have all your driveway’s support structures in place you can begin applying the top layer of fresh surface asphalt. Surface asphalt is made up of sand, oil, and small aggregate. The combination of these three materials creates that jet-black asphalt looks and when installed correctly it provides a smooth, shiny and attractive finish.
Once it’s down, take a step back and enjoy the view.

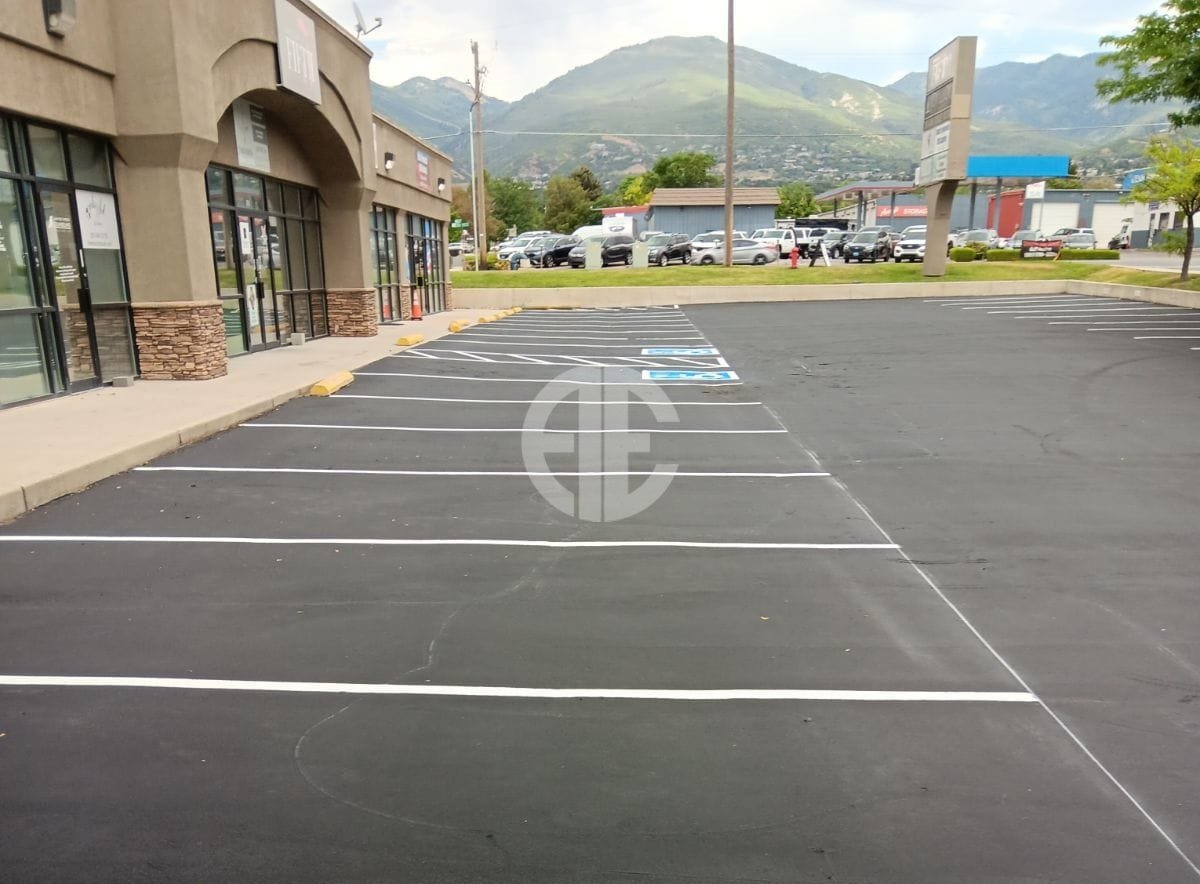
STEP 6: CONNECT OLD SURFACES TO NEW ONES
The final step is the finishing touches. Chances are that your new asphalt connects to driveways, roadways, and even parking lots. Because of this, you’ll need to create a smooth transition between the two structures.
Butt joints is the official name of the areas where old asphalt meets new asphalt.
More than aesthetically pleasing, butt joints need to also be graded correctly – this will make sure water will run-off at every butt joint and you don’t end up with damaged patches. Keeping butt joints smooth and comfortable to use is also important for drivers and pedestrians. If the butt joints are smooth, they won’t notice a difference between the old and the new asphalt when driving or walking over it.
With those steps completed, you should have a smooth, good-looking driveway!
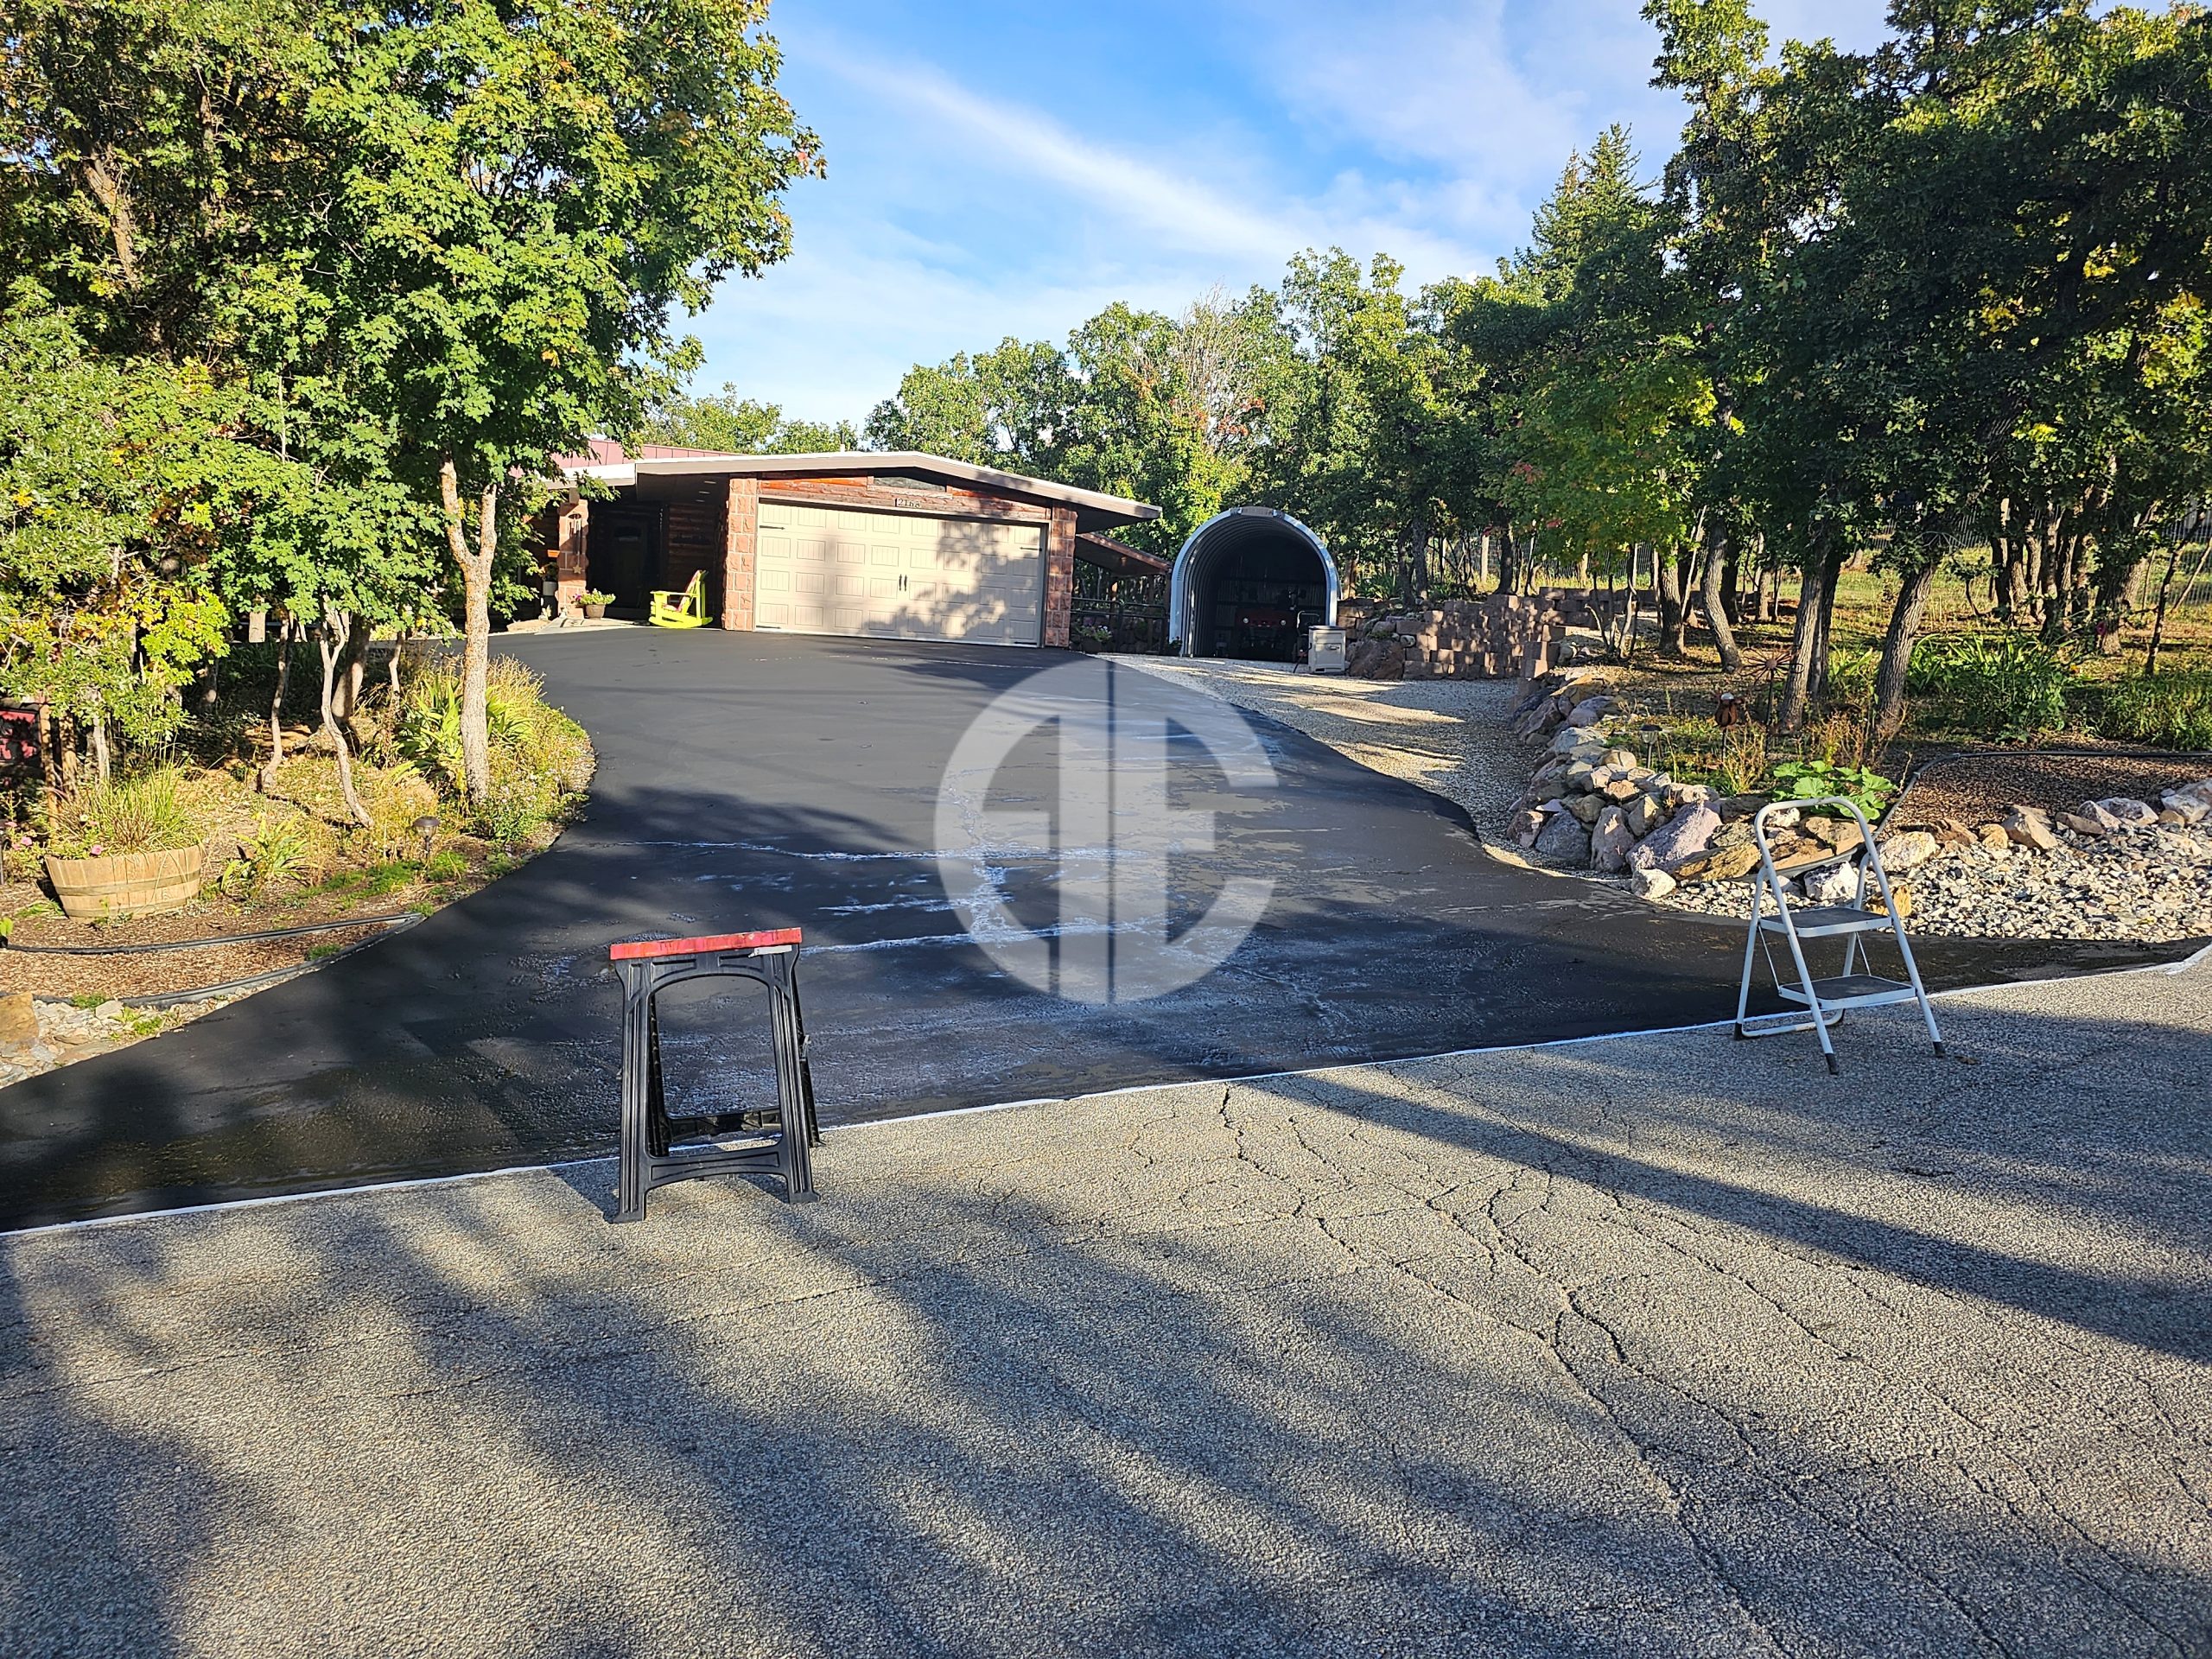
BONUS STEP: SEALCOAT – BUT NOT YET
Sealcoating (or asphalt sealing) is very important for extending the useful life of your driveway. However, it is important to allow the asphalt to fully cure before applying any asphalt sealing product. This means waiting at least 3 months and maybe up to a year before sealcoating.
SOUND LIKE A LOT OF HARD WORK? GET THE PROFESSIONALS IN TO DO IT FOR YOU.
At Asphalt Experts, we provide high-quality asphalt paving, asphalt repair, and asphalt maintenance to residential, commercial municipal, and industrial clients. If you’re in need of some help paving your new asphalt driveway then get in touch today.
Call +1 801-318-0949 during business hours to get a guaranteed same-day response.
Get in touch with us today for a free quote.

Steps for properly installing or repairing asphalt:
- Thoroughly evaluate the conditions that created the issues
- Review site grade to mitigate water drainage issues
- Pre-mark areas to ensure all expectations are met
- Saw & remove damaged pavement
- Thoroughly clean the repair area
- Evaluate condition of sub-base
- Add and compact new base as required
- Adequate amount of tack for adhesion
- Install hot mix asphalt
- Clean work area prior to leaving
Installing or replacing an asphalt driveway involves careful consideration of factors like weather conditions, wear and tear, and heavy traffic. It’s essential to choose the right paving materials and techniques, such as seal coating and crack sealing, to extend the life of your paved surface. Preventing water damage, UV rays, and potholes through pothole repairs and regular maintenance enhances the curb appeal of your property. For cost-effective solutions, consult expert blog posts on asphalt surfaces and pavement surfaces for your driveway or parking lot.
Trust Asphalt Experts – Your Partner for Asphalt Care Excellence in Utah.


 Clearfield